- Get link
- X
- Other Apps
LATEST POST
- Get link
- X
- Other Apps
Producing moving images has become so easy, that these days even children can use a camera. What’s more, Smartphones, action cameras or DSLRs can capture footage at resolutions that were in the realm of science fiction just ten years ago. Despite the rapid development of the video recording equipment, the process of making a video is still pretty much the same as it was in the early days of cinema. After you make a recording, you need to assemble the clips into a coherent and compelling audio-visual story, but luckily you no longer have to actually cut pieces of film stock and piece them together. You can use a video editing application, instead.
So, in this article we will show you a video editing software which is easy to use yet provides some powerful features allows you to be more creative with it: Wondershare Filmora9 Video Editor.
Why I Use Filmora9 to Edit Videos?
Mastering professional video editing software products like Final Cut Pro X or Adobe Premiere Pro can take years of hard work, which is the reason why a lot of people are reluctant to even try to learn the basic video editing techniques. Filmora’s latest version Filmora9 combines simplicity with powerful video editing tools with the aim to make the video editing process both faster and easier. The Filmora9 video editor supports a wide range of video file formats including 4K files, so you don’t have to worry about whether or not you can use a certain clip in your video. Filmora9 also supplies you with all the tools you’re going to need to create a video your friends are going to enjoy watching.
Mac or PC users can download the unlimited free trial version before purchasing the one-year ($39.99) or lifetime license ($59.9), which makes this video editor perfectly suited for aspiring social media content producers, gamers or online marketers. Regardless of the reasons why you use Filmora9, the Filmora’s video editing software will make the process of creating a video quick and smooth. So let’s have a look at what Filmora9 has to offer.
What I Like About Filmora9
In this newly released Filmora9 version, there are some cool features that I really enjoy:
- Intuitive & Clean User Interface & Easy to Use:
- Fully Integrated 4K Editing & Customizable Preview Quality
- Better Video Editing Performance
- Improved Audio Editing Features
- PC/Mac Cross-Compatibility: Editing the same projects on either OS
In this following part, I will show you how did I edit my video footage in Filmora9 in details. You can now download it now to follow up.
Processing Raw Footage with Filmora9 Video Editor
You will experience no difficulty starting a new project in Filmora9, even if you’ve never edited a video before. After downloading and installing the video editing software from Filmora offical website, just click on the Filmora9 desktop icon to launch and then choose between New Project and Open Project options. All projects you worked on in Fimora9 will be displayed in the Project Library so you can just click on a recent project and continue editing your video.

All files you import into a project in Filmora9 will be located in the Media Library Panel, and you can add new files simply by dragging them from a folder on your computer and dropping them to the media panel. Optionally, you can use the Import drop-down menu to add an entire folder to a project or to download media from Facebook and other social media platforms. The Record drop-down menu offers screen capturing features as well as the option to record voiceovers. The amount of time you will have to spend waiting for the large number files to be imported is reduced to the minimum, so you can easily add as many new files to your project as you want.

Additionally, you can add up to a hundred video tracks to the timeline and choose from three different track sizes, which is probably the most pleasant surprise the Fillmora’s latest update brings. This means that you can easily create PIP videos or use the editor’s compositing features to make your videos more visually dynamic. All you have to do in order to add an audio or a video file to a track on the timeline is drag and drop it to a specific location.

Filmora9’s toolbar grants you quick access to basic video editing tools that let you cut or crop a clip, change its duration. More advanced options you can use to perform color correction or create the Chroma Key effect are also available on the app’s toolbar.
![]()
The Filmora9 video editor is equipped with rich Effects, Audio, Transitions and Titles galleries, so you can easily add a filter or an overlay to a video clip, create a memorable soundtrack for free or transition from one clip to another smoothly. The best part is that you just have to click on the effect, a song or a transition in order to add it to your project.

The Advanced Color Correction window lets you choose from a seemingly endless selection of color correction presets, but you can also use the Adjust tab to create your own presets. Filmora9’s users have complete control over the color properties of each clip they want to include in the final version of the video they are editing.

Besides impressive video editing capabilities, the Filmora’s most recent update also delivers improved audio editing options. Aside from the fact that you can now add as many as one hundred audio tracks to the timeline, the enhanced waveforms make the process of editing audio cues much simpler. Furthermore, you can now use keyframes to adjust the sound volume or create a fade in and fade out effects. Check the YouTube tutorial below about how to make the audio transition in Filmora9.
Once you’re done working on your project, you should just click on the Export button in order to gain access to Filmora9’s exporting options.
Filmora9’s Exporting Capabilities
Like all video editing apps for Mac and PC computers, Filmora9 lets you export all videos to a destination on your hard drive. With the latest update, the amount of time you will have to spend on rendering files is significantly reduced, so there is less room for your computer to crash at a crucial moment.

Once you gain access to the Export window you will see several different tabs that allow you to customize the export settings in accordance with the demands of your project. The Local tab offers a wide range of Format options, so you can choose the file format that is best suited for the particular video you’re exporting. What’s more, you can pick the resolution, frame rate or the quality of the file as well as fine-tune the Audio settings.

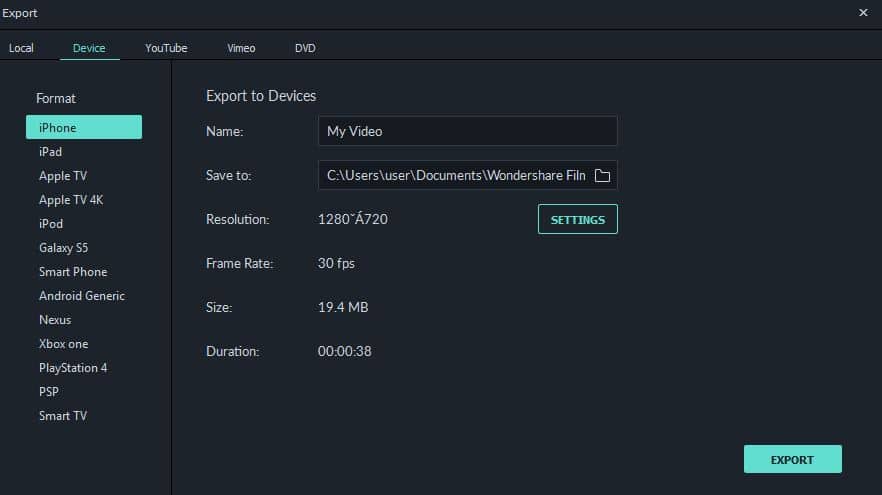
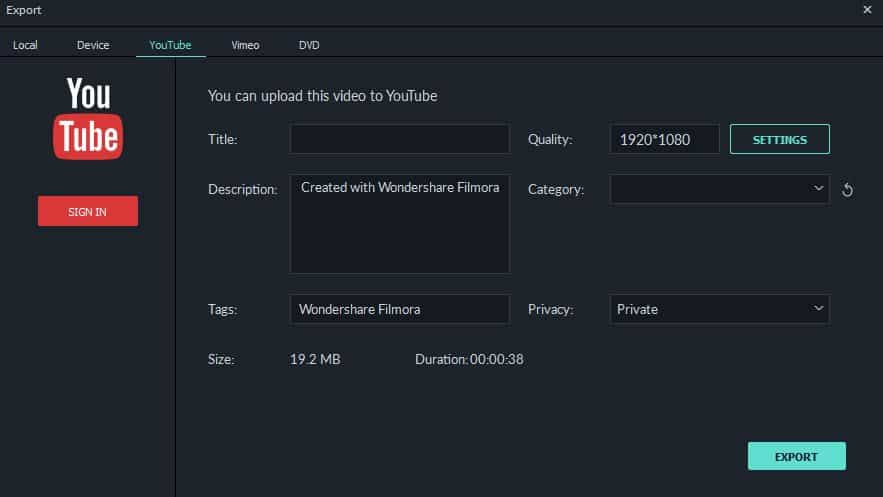
The Device tab features a list of devices such as iPhone, PS4 or Smart TV, and after you choose one all the export properties will be adjusted automatically. Filmora9 also lets you export your video directly to your YouTube channel or your account on Vimeo, so you don’t have to waste time on exporting a file locally and then upload it to the Internet. How long the rendering process is going to take depends on how large the file is and how powerful your computer is, despite the improved rendering speed Filmora9 offers.

Verdict
In the last few years, Filmora’s video editing potential has been steadily improving with each new update. That’s why it is hardly surprising that Filmora9’s video editing features build upon an already impressive set of video editing options. This video editing app is both powerful and remarkably easy to use, which means that you can create stunning videos with it, even if you are a newcomer to the world of video editing. The only important thing is to be passionate about producing unique content, and Filmora9 will take care of the rest.
The post Filmora9 – A Video Editing Software Anyone Can Master appeared first on TechWorm.
from TechWorm http://bit.ly/2QJ87j2
Comments
Post a Comment